0. Node.js动态文件编译的问题
在一切开始之前,先要明白一点:Node.js虽然使用Javascript语言编写,但是他的运行机制和Java、C++等编译型语言类似。也就是说,使用Node.js编写的代码如果要正常运行,是先要经历一个类似编译的过程的。
Node.js的这种运行机制所直接引发的结果就是:
- Node.js比普通Javascript运行速度要快。是否比Java和C++快我不清楚,但是至少应该比PHP快(因为PHP是解释性语言)。
- Node.js代码再修改后,必须重新运行node XXX.js命令后才能生效。
1. 利用NPM
npm有几个比较重要的命令:install,uninstall,init,run
1.1 install
带参数的install
当项目需要添加一个新的包的时候,使用npm install 包名称 --参数的形式,这时有四种安装方式可能:
npm install 包名称             //安装到当前cmd所在目录,不将包的依赖关系写入package.json文件
npm install 包名称 --save      //安装到当前cmd所在目录,将包的依赖关系写入package.json的dependencies节点
npm install 包名称 --save-dev  //安装到当前cmd所在目录,不将包的依赖关系写入package.json的devDependencies节点
npm install 包名称 -g          //安装到全局目录下,不将包的依赖关系写入package.json文件,且安装的这个包全局可用。
所以呢,对于Node.js使用的工具类包,比如:查询Node.js对ES6的支持度,使用--g是比较合适的,因为你肯定不希望每次使用这个工具的时候还要特意的将cmd目录切换到安装目录下。
而对于Node.js项目中使用的第三方类库比如express等,使用--save是比较合适的。因为这个类库只对当前项目有效。
不带参数的install
上面提到了,如果使用npm install 包名称 --save命令,会将安装的包的信息添加到package.json文件中。
package.json可以通过npm init命令创建,也可以在第一次使用npm install 包名称 --save命令的时候创建。
package.json文件有四个比较重要的节点信息:dependencies、devDependencies、script、main。
- dependencies
你的Node.js项目可能会通过npm install 包名称 --save命令安装很多包,当你把你的项目给别人的时候,你不需要把这些安装的包文件发给他们,因为你的这个包信息都写在了dependencies节点下面,拿到你项目文件的人只需要在项目目录中运行npm install,就可以安装所有package.json的dependencies节点下面的包了。这就极大的提升了项目和系统移植的便捷性。 - devDependencies
和dependencies节点的功能类似,只不过devDependencies节点下面的包只在你开发的时候有效,换句话说这些包是你在开发的时候临时用的。 - script
在项目目录中使用npm run 命令的时候,运行的实际上就是script节点下预先定义好的命令。 - main
指定整个Node.js项目的入口文件。
1.2 uninstall
卸载安装的包,如果这个包存在于package.json文件的dependencies节点中,相关信息将会被移除。
1.3 init
初始化一个新的Node.js项目,自动生成package.json文件架构。
1.4 run
npm run 命令
运行package.jsons文件cript节点下预先定义好的命令
2. events事件模块
events模块只提供了一个对象:events.EventEmitter。EventEmitter的核心就是事件触发与事件监听。
var events = require('events');   //引入events模块
var emitter = new events.EventEmitter();    //新建EventEmitter对象
emitter.on('someEvent', function(arg1, arg2) {
    console.log('listener1', arg1, arg2);
}); //事件监听
emitter.on('someEvent', function(arg1, arg2) {
    console.log('listener2', arg1, arg2);
}); //事件监听
emitter.emit('someEvent', 'byvoid', 1991); //事件触发。一个事件触发可以对应多个事件监听
3. fs文件系统模块
3.1 fs模块概述
Node.js 文件系统(fs 模块)模块中的方法均有异步和同步版本,例如读取文件内容的函数有异步的 fs.readFile() 和同步的 fs.readFileSync()。
异步的方法函数最后一个参数为回调函数,回调函数的第一个参数包含了错误信息(error)。
建议大家使用异步方法,比起同步,异步方法性能更高,速度更快,而且没有阻塞。
3.2 readFile,writeFile
读取和写入文件,适用于读取和写入数据量不大的情况。如果读取写入数据量很大,建议使用后面的stream相关函数。
var fs = require("fs");
// 读取文件
fs.readFile('input.txt', function (err, data) {
   if (err) {
       return console.error(err);
   }
   console.log("读取: " + data.toString());
});
// 写入文件
fs.writeFile('input.txt', '我是通 过fs.writeFile写入文件的内容',  function(err) {
   if (err) {
       return console.error(err);
   }
   console.log("数据写入成功!");
});
3.3 createReadStream,createWriteStream,pipe
对于大型文件的输入输出,使用stream相关函数。这样可以将大文件切分为小的块通过stream进行传输。
先看数据读取:
var fs = require("fs");
var data = '';
// 创建可读流
var readerStream = fs.createReadStream('video.mp4');
// 数据读取进行时
readerStream.on('data', function(chunk) {
   console.log(chunk);//这里面打印的就是buffer信息。
});
// 数据读取结束时
readerStream.on('end',function(){
   console.log("程序执行完毕");
});
// 数据读取出错时
readerStream.on('error', function(err){
   console.log(err.stack);
});
再看数据输出
var fs = require("fs");

var readerStream = fs.createReadStream('video.mp4');
var writerStream = fs.createWriteStream('video-bk.mp4');

readerStream.on('data', function(chunk) {
   writerStream.write(chunk);
});
pipe直接对接输入输出流
上面的输出代码可以通过pipe简化为:
var fs = require("fs");

var readerStream = fs.createReadStream('video.mp4');
var writerStream = fs.createWriteStream('video-bk.mp4');

readerStream.pipe(writerStream);
4. http和https模块
4.1 创建http服务器。
//server.js
const http = require('http');

const hostname = '127.0.0.1';
const port = 3000;

const server = http.createServer((req, res) => {
  res.statusCode = 200;
  res.setHeader('Content-Type', 'text/plain');
  res.end('Hello World');
});

server.listen(port, hostname, () => {
  console.log(`Server running at http://${hostname}:${port}/`);
});
//在cmd下运行node server.js即可。
4.2 爬取网页内容
http继承于stream类,所以其监听事件与stream很像。
如果是http网站。
const http = require('http');
http.get("http://www.royotech.com",function(response){
    var html = "";
    response.on("data", function(data){
        html = html + data;
    });
    response.on("end", function(data){
        console.log("网页爬取结束");
        console.log(html);
    });
});
如果是https网站。
const http = require('http');
http.get("https://www.sina.com",function(response){
    var html = "";
    response.on("data", function(data){
        html = html + data;
    });
    response.on("end", function(data){
        console.log("网页爬取结束");
        console.log(html);
    });
});
5. cheerio模块
该模块可以用来分析html代码。
const http = require('http');
const cheerio = require('cheerio');

http.get("http://www.royotech.com",function(response){
    var html = "";
    response.on("data", function(data){
        html = html + data;
    });
    response.on("end", function(data){
        console.log("网页爬取结束");
        const $ = cheerio.load(html);
        let linksSet = $('a');
        for(let i=0; i<linksSet.length; i++){
            let url = linksSet[i].attribs.href;
            if(url && url.search("http") != -1)
                console.log(url);
        }
    });
});
6. express框架
express框架本质上是基于Node.js的web相关模块进行的封装。
6.1 使用express框架搭建一个web服务器。
const express = require("express");
const app = express();
app.listen(3030,function(err){
    if(err){
        console.log(err);
        return;
    } else {
        console.log("服务器已经启动,请访问http://localhost:3030");
    }
});
app.get("/",function(request,response){
    response.send("这里是首页");
});cmd下运行node index.js后访问:http://localhost:3030/
6.2 express的get方法。
const express = require("express");
const app = express();
app.listen(3030,function(err){
    if(err){
        console.log(err);
        return;
    } else {
        console.log("服务器已经启动,请访问http://localhost:3030");
    }
});
app.get("/",function(request,response){
    response.send(`这里是首页!<br/>
    你可以<a href="http://localhost:3030/get_username/">点我</a>进入get_username页面,或者直接在浏览器上输入"http://localhost:3030/get_username/"访问
    `);
 });
app.get("/get_username",function(request,response){
   response.send({
       name:"张三",
       sex:"男"
   });
});cmd下运行node index.js后访问:http://localhost:3030/
6.3 express的post方法。
//根目录下index.js文件
const express = require("express");
const app = express();
app.listen(3030,function(err){
    if(err){
        console.log(err);
        return;
    } else {
        console.log("服务器已经启动,请访问http://localhost:3030");
    }
});

const bodyParser = require("body-parser");
app.use(bodyParser.json());//分析提交上来的数据,将数据转换为json后挂在到request的body属性上。
// 创建 application/x-www-form-urlencoded 编码解析
var urlencodedParser = bodyParser.urlencoded({ extended: false });
app.post("/doRegister", urlencodedParser, function(request,response){
    response.send({
        username:request.body.username,
        password:request.body.password
    });
});
根目录下register.html文件的内容如下:
<html>
    <head>
        <title>注册页面</title>
    </head>
    <body>
        <div>
            <form action="/doRegister" method="post">
                用户名:<input name="username" type="text">
                密码:<input name="password" type="password">
                <input type="submit" value="注册提交">
            </form>
        </div>
    </body>
</html>
6.4 使用express.static来设置静态文件。
加入我们在项目根目录中建立一个public文件夹,里面增加两个静态文件:
- admin.html
- flower.png
admin.html的内容如下:<html> <head> <title>Hello Index</title> </head> <body> 你好!绝对路径下的花朵 <img src="/flower.png"> <hr/> 你好!相对路径下的花朵 <img src="./flower.png"> </body> </html>再在根目录创建index.js文件,代码如下:
const express = require("express");
const app = express();
app.listen(3030,function(err){
if(err){
    console.log(err);
    return;
} else {
    console.log("服务器已经启动,请访问http://localhost:3030");
}
});
app.use(express.static(__dirname + "/public"));
cmd下运行
node index.js后,浏览器中访问http://localhost:3030/admin.html 的结果如下:
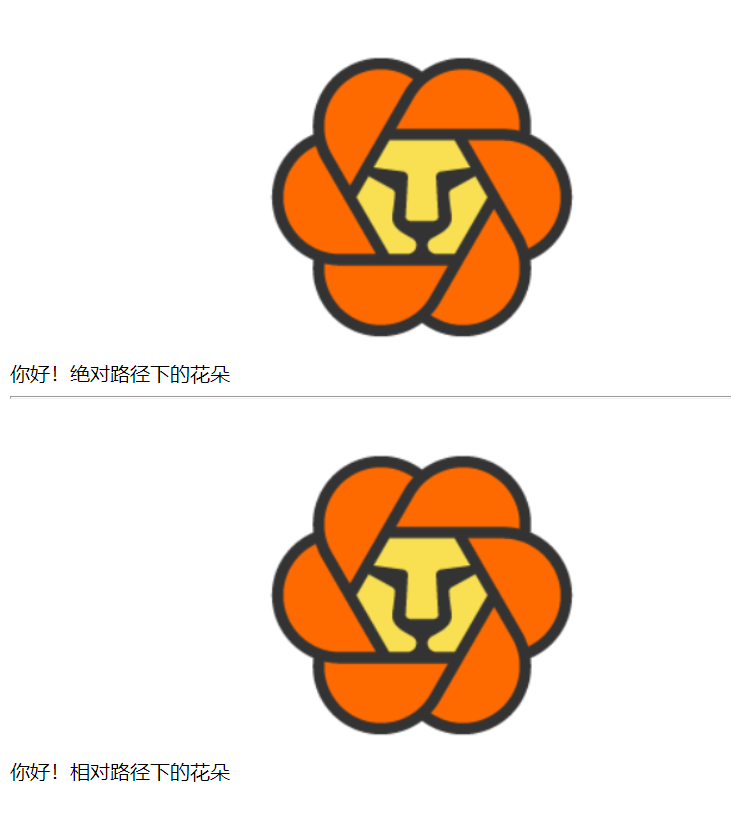
这里要表达的是:
当某个文件夹A使用express.static设置为静态文件存储目录后,无论之前文件夹A所处的实际目录在什么位置,被设置后的A文件夹都被视为网站的根目录,对应的A文件夹下面的所有文件都被视为在网站根目录下,且文件类型都是静态文件。
6.5 配合axios实现Ajax功能。
//index.js
const express = require("express");
const app = express();
app.listen(3030,function(err){
    if(err){
        console.log(err);
        return;
    } else {
        console.log("服务器已经启动,请访问http://localhost:3030");
    }
});
app.use(express.static(__dirname + "/public"));

app.get("/get_username",function(request,response){
   response.send({
       name:"张三",
       sex:"男"
   });
});
<!--index.html-->
<html>
<head>
<title>Hello Index</title>
<script src="https://cdn.bootcss.com/axios/0.19.0/axios.min.js"></script>
<script>
function getUserName(){
axios.get("./get_username").then(function(result){
document.getElementById("user_name").innerHTML = result.data.name;
});
}
</script>
</head>
<body>
这里是网站首页
<button onClick="getUserName()">获取用户名,通过Ajax请求</button>
<div id="user_name"></div>
</body>
</html>6.6 使用Express的Router路由
const express = require("express");
const app = express();
app.listen(3030,function(err){
    if(err){
        console.log(err);
        return;
    } else {
        console.log("服务器已经启动,请访问http://localhost:3030");
    }
});
app.use(express.static(__dirname + "/public"));

const userRouter = express.Router();
const genderRouter = express.Router();
userRouter.get("/",function(request,response){
    response.send({
        name:"张三",
    });
 });
 genderRouter.get("/",function(request,response){
    response.send({
        gender:"男",
    });
 });
app.use("/get_username",userRouter);
app.use("/get_gender",genderRouter);

// //等同于下面的代码
// app.get("/get_username",function(request,response){
//    response.send({
//        name:"张三",
//    });
// });

// app.get("/get_gender",function(request,response){
//     response.send({
//         gender:"男",
//     });
//  });
7. Node.js连接MongoDB数据库
7.1 安装mongodb模块。
cmd切换到工作目录,然后:
cnpm install mongodb --save7.2 连接数据库代码
//数据库名:product
//集合名:product_info
const mongodb = require("mongodb");
const mongoClient = mongodb.MongoClient;
var DB_CONN_STR = "mongodb://localhost:27017";
mongoClient.connect(DB_CONN_STR,function(err,client){
    if(err){
        console.log(err);
    } else {
        console.log("数据库连接成功!");
    }
    client.db("product").collection("product_info").find({}).toArray(function(err,result){
        if(err){
            console.log(err);
        } else {
            console.log(result);
        }
    });
    client.close();
});